 Home
Home Sewing, Embroidery & Serger
 Cutting machines
 Brands
 Review

Classical sewing machines are used in many working situations but they can go wrong in many ways. Sometimes they can be dangerous, sometimes they perfectly thread but finding the second option is sometimes quite hard. Usually, sowers are relatively scared to fix problems like thread bunching or adjusting the tensions as something could go very wrong, even when working in a job. If the tensions are off then both sides of the stitching will look equal, without any differences. There are, of course, many other effects and if you are here to understand fixing tension, I suggest you read on, to find out how to adjust tension on sewing machine.
What is a sewing machine tension?
Sewing machine tension is one of the most vital parts of the sewing machine. If the sewing machine tension is off then the thread will turn out wrong, whether it be any part of the working procedure, such as weaving, if the tension is wrong either the top or bottom of the thread. There are many of sewing machine tension problems, but knowing how to fix these is a must.
Essentially tension makes both sides of the thread equal to avoid extra bobbin or thread on the side it should not be on. Tension works by pressure being put onto the thread, which can work if the tension is correct for that piece of thread. Tension can be adjusted and when adjusting there is usually a dial that makes it easy to fix.
Knowing if your tension is a problem:
Adjusting sewing machine tension has to be done with everybody’s beloved machines after a while, but when is the time to adjust the setting? Good question, there are plenty of situations where tension is likely to be the problem, which we will get into below. Just remember, if nothing is wrong don’t change it and also test a spare piece of fabric on the new tension, if you need one.
One situation tension may be the problem in is when the stitching is not equal on both sides. The height of thread may be different on one side to another or the pattern. You can easily see whether either side are uneven or not when you look at a piece of fabric, if they are not it is time for a change of setting. Also, bobbin can be seen on top of the side being sewed, which shows inconsistency in the tension. Also, needle thread may be visible on the bottom of the visible side, the side being thread, because all the bobbin thread is on the other side.
Check the following things before changing the tension:
- The size of the needle, threads and fabric can all contribute to a tension change whilst bobbin, which can also result in loops of the thread. Total top tension can be affected by needles that are too big or small for the thread being used. This can be noticed when puckers are occurring during sewing of lightweight fabrics. In this situation, you could try using a straight-stitch foot and needle plate as a substitute and the last resort before a change of tension
- Make sure the right pressure foot is attached to your machine, so the technique is also correct.
- Dirty machines are one of the main causes of tension problems. Dirty machine examples include thread stuck between tension discs, and pretty much anywhere that thread can get stuck, like under the throat plate, around the bobbin case and anywhere else. When this occurs, the best thing to do is use floss in the machine’s tension discs. This can be done using a thin lightweight object. If there is still a tension problem I suggest you read on to how to adjust tension on sewing machine.
- Machine parts can become damaged over time, which will likely affect the tension of the sewing machine. Anything from half-snapped needles, broken bobbin, broken tension disks, anything on the machine can lead to a change in tension. Metal bobbins can be easily dropped and there is no need to try to adjust it. Bin the bobbin straight away because the smallest dent, bend or any other type of damage can result in a changed tension.
- You may have threaded the machine wrong. Make sure you go other the guides for the thread as this can distort tension or create loops in the thread, even after the littlest mistake. Also, make sure the bobbin had no chance of slipping by making sure the pressure foot was always down while you sewed. Other threading mistakes include inserting the bobbin incorrectly, not using a bobbin spool, the thread keeps changing its wilding shape or is the thread catching onto the splash spool.
Tension tools:
The three main tension tools you will need are tension assembly, thread guide and bobbin-case spring. You will need to know about the three of them before learning how to adjust tension on sewing machine.
Tension assembly consists of both tension discs and tension regulators. Tension regulators are important because they control the amount of applied pressure to the thread, which will need to be adjusted if you have a need to change the setting. When the regulator is found inside of the machine, there should be an electric system controlling it. The tension disc squeezes the thread so it stays in a straight line. The disc is usually controlled by a control panel on the front of the machine; because of this, they can sometimes control 2 threads at one time.
Thread guides are used to guide the thread along with a certain direction. There are many thread guides in a sewing machine and they apply resistance to the thread, which is in addition to the resistance the tension discs apply.
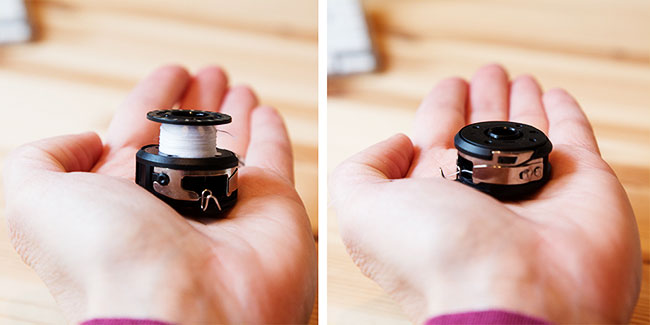
Lastly, the bobbin-case spring is used to put pressure on the thread that is being used as soon as it releases from the bobbin case. A small screw controls the amount of pressure which is located at the back of the spring. The screw is what is needed to increase tension and decrease tension, by turning the screw left and right.
Adjusting the tension:
Now what you probably need to know is how to adjust tension on sewing machine, well this is actually very simple once you know. Think of it as a tug war, both sides need to be equal and the top side should only show top thread, while the bottom should only show bobbin thread.
In the situation where there is top thread visible on the bottom of the thread, you should increase the top tension by tightening it. To do this, you need to find the tension regulating dial, which can be found in the sewing machine manual as it is different on each model. Then you need to increase the tension by tightening the thread, which can be done by increasing the number on the dial. Keep testing it out until both sides are equal again.
When bobble is visible in the top thread, it will have to be loosened. Once again, find the regulating dial and take the thread down numbers this time. Carry on practicing stitching until both sides are equal, at this point is a perfect tension.
If neither of this work, you should resort to changing the bobbin-case spring. However, this should only be the case if a heavier or lighter thread than what is normally used, is being used. If the thread is heavier than usual then it will need a higher tension, to do this, increase the dial number until both sides are equal. If the thread is lighter than usual then it will need a lower tension, so you use a lower number on the dial and keep testing it out until both sides of the thread are equal.
Conclusion:
Even if you use the best sewing machine available, you will have to face the tension problem sooner or later. It could just be a simple cause which is the problem, such as loops in the thread. A lot of the time, adjusting the tension can be avoided. But in those times where it is needed, it needs to be done correctly. Knowing when to make the tension higher or lower is an important part of a great sower, so make sure you know how to do it. Otherwise, problems will arise in the clothing or fabric that you are making.


